Using Attributes In Title Blocks
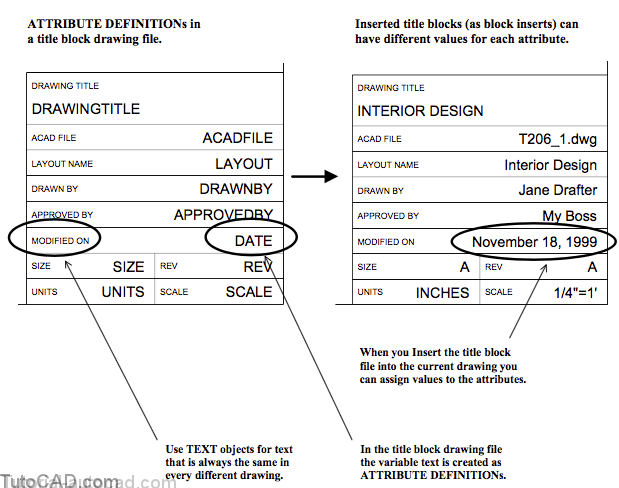
Title blocks normally require two types of text data.
- text that is always the same in every drawing (use TEXT) (e.g. labels such as “Modified On”)
- text that is specific to the current drawing (use ATTRIBUTEs) (e.g. text beside labels such as “November 18, 1999”)
Create your title block as a drawing file and use ATTRIBUTE DEFINITIONs for the text that must change in each drawing.
- then Insert the title block drawing into the current drawing and assign Values to each attribute in the resulting BLOCK INSERT.
PRACTICE USINE ATTRIBUTES IN TITLE BLOCKS
» 1) Close the drawing from the previous exercise if it is open.
» 2) Open the T207_6.dwg drawing in your personal folder.
» 3) Pick Draw + Block + Define Attributes. Enter DRAWNBY as the Tag, Drawn by as the Prompt and [Your Name] as the Value. Change Justification to Right. Pick the Pick Point button for the Insertion Point and use an Endpoint osnap shown near P1. Then pick OK to create the new ATTRIBUTE DEFINITION.
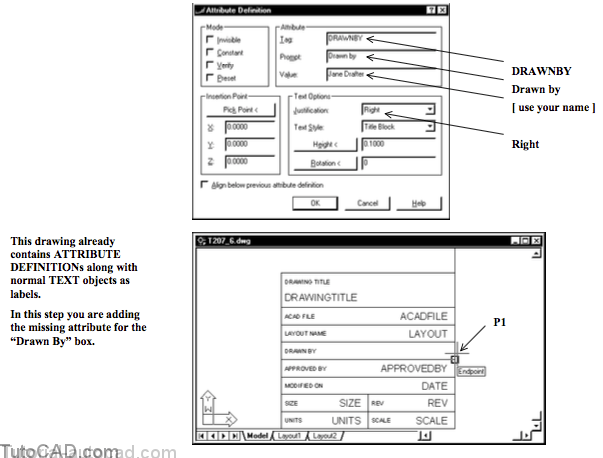
The other ATTRIBUTE DEFINITIONs have a small margin of space to the right and below.
- in the next step you will Move the Last ATTRIBUTE DEFINITION to create this margin for the Drawn by attribute.
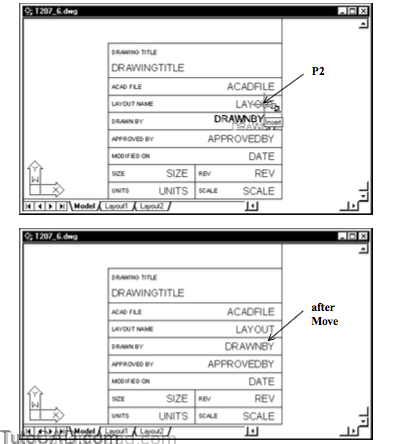
4) Pick Modify + Move and enter L to select the Last object then press <enter> to continue. Invoke the Endpoint osnap near P1 and left-click to use this as the base point.

5) Press & hold <Shift> while you right-click in the drawing area to invoke a shortcut and select Insert as the osnap mode. Then move your crosshairs to invoke the Insert osnap marker shown near P2 and left-click to use this as the second point.
» 6) Save your changes to this drawing & Close the file.
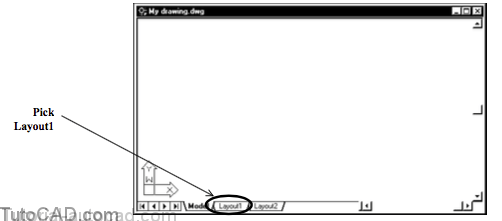
» 7) Start a New drawing from scratch using English default settings and Save this drawing as My drawing.dwg in your personal folder.
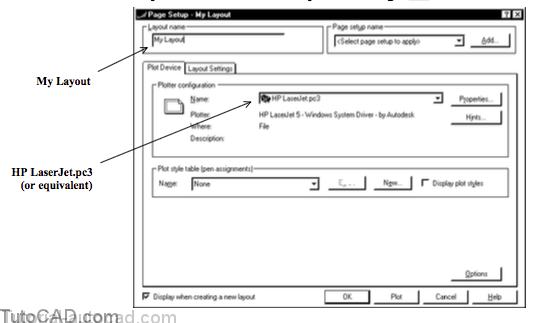
» 8) Left-click on the Layout1 tab to invoke the Page Setup for this layout.
9) Select the Plot Device tab and select the HP LaserJet.pc3 file (or equivalent) Name. Change the Layout Name to My Layout then select the Layout Settings tab to continue.
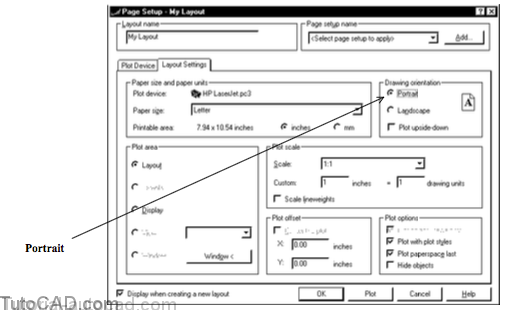
10) Select Portrait for the Drawing orientation then pick OK to complete the Page Setup.
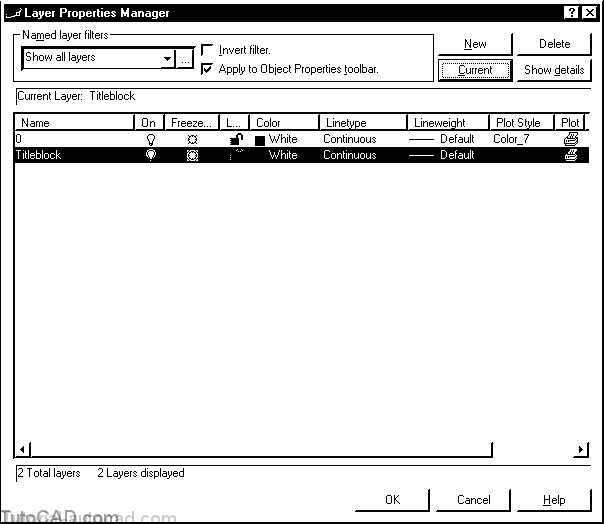
11) Pick Format + Layer. Pick the New button and type Titleblock as the new layer name. Pick the Current button then pick OK to exit Layer.
12)Pick Insert + Block. Pick Browse then select T207_6.dwg in your personal folder and pick Open to return to the Insert dialogue box. Uncheck all Specify On-screen boxes and pick OK to continue.

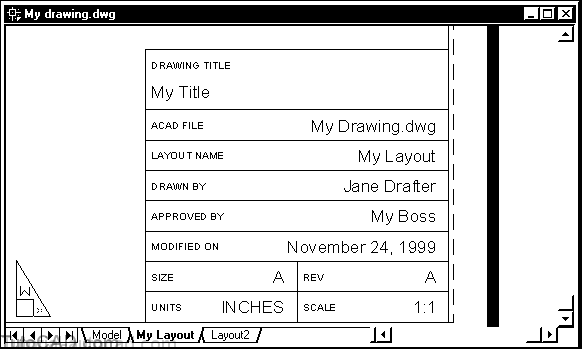
13) Enter the values for attributes as shown below or use your own values. You must pick the Next button to change the last two attribute values in this block. Pick OK when you are done entering values.

The order of attributes in this dialogue box is determined by the order in which the attribute definitions were created.
- the last attribute definition to be created was the one that you created as DRAWNBY.
14) Pick Modify + Erase and select the Viewport border of the viewport that was automatically created when you used Page Setup. Then press <enter> to delete it.
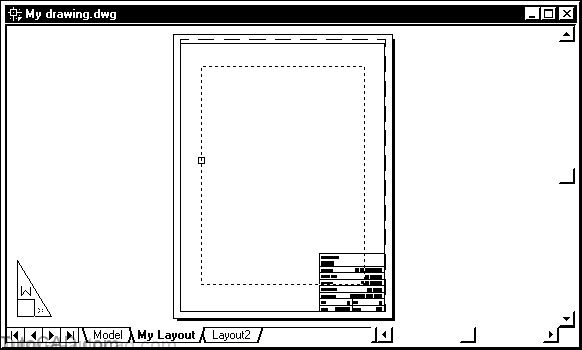
15) Zoom in for a closer view of the title block attribute values.
16) Save the changes to your drawing and Close the file.