Overriding Dimension Styles
Why?
You will probably want to create dimensions that deviate only slightly from an existing dimension style.
- it can be inefficient to define a completely new style for only a few similar dimensions in a drawing (e.g. to add tolerances).
- you can override the dimension style for a few dimension variable settings on selected dimension objects.
How?
There are at least four different ways to override a dimension style.
- define <style overrides> before creating new dimensions.
- define <style overrides> before updating existing dimensions.
- use Properties on existing dimensions and modify the desired dimension properties that you want to override.
- select existing dimensions (no command running), right-click to invoke a shortcut then select dimension editing options.
Creating new <style overrides>
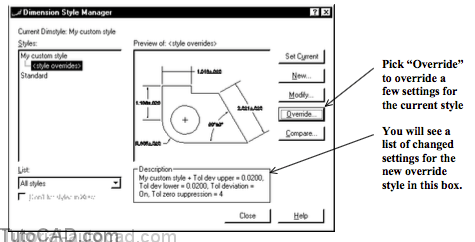
Invoke Dimstyle then pick the Override button.
- change dimension settings using the same tabs as when youModify existing styles or when you create New styles
- you will see <style overrides> under the current style in the Styles list & a list of changed settings in the Description area.
- new & updated dimensions will use the original style with any changes defined in the <style overrides>.
Clearing all <style overrides>
When you create <style overrides> they will remain in effect until you explicitly clear them.
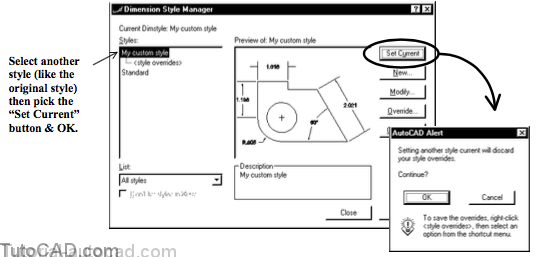
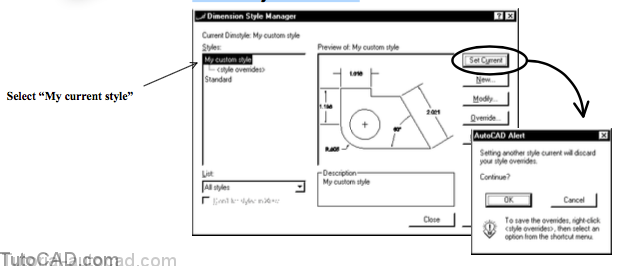
- one way to clear overrides is to select another style in the Dimstyle list and then pick the Set Current button.
- you are warned that <style overrides> are lost if you continue.
You can also right-click on <style overrides> in the Dimstyle Styles list to invoke a shortcut.
- select Rename to define a new style (not an override) that corresponds to the current style + <style overrides>
- select Delete to clear the <style overrides>
- select Save to current style to merge the <style overrides> into the current style and then clear the <style overrides>.
You can also restore selected dimensions (that have <style overrides> applied) back to their original dimension styles.
- pick Dimension + Override then right-click in the drawing area to invoke a shortcut & select Clear overrides.
- you are prompted to select dimensions that you want to restore back to their original states (no <style overrides>)
- however, this does NOT clear <style overrides> if they are currently in effect.
Overriding styles using Properties
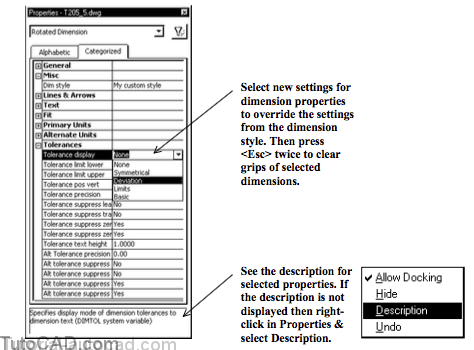
The Properties tool is an effective way to override dimension styles.
- select the existing dimension(s) when no command is running.
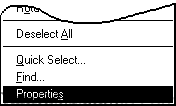
- right-click in the drawing area to invoke a shortcut then select Properties to edit dimension properties.
- press <Esc> twice to clear grips of the selected dimensions
- then dismiss Properties (or leave it docked on one edge of the AutoCAD window).
Settings for dimension variables are organized in the same set of categories as the corresponding tabs in Dimstyle.
- use the Misc category to change the dimension style itself.
- click on to expand categories and click on to collapsecategories (scroll bars appear as required).
- if the entire property is not displayed you can hold your cursor over the property to display the entire property in a tooltip.
When you use this approach for overriding dimension styles you do not have to clear <style overrides> (you do not create any).
- you are directly modifying properties of individual dimension objects and the current dimension style does not change.
Right-click Shortcuts
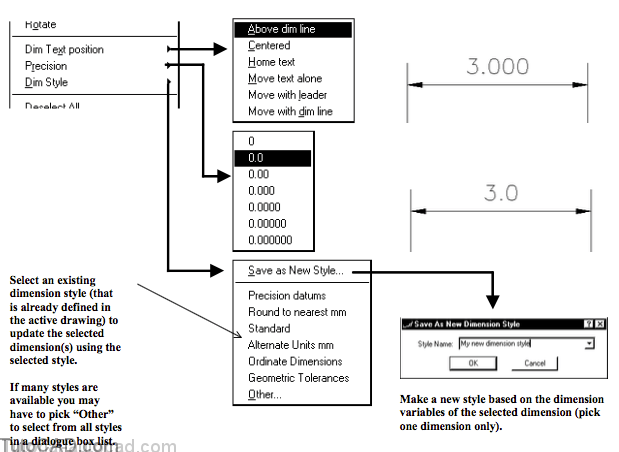
Right-click shortcuts are effective for common changes.
- simply select existing dimensions (with no command running) and right-click in the drawing area to invoke a shortcut.
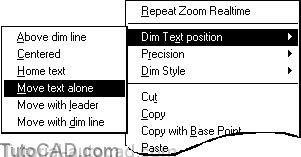
Use Dim Text position to change the location of dimension text.
- Above dim line places dimensions above the dimension line (see page 15 for the corresponding dimension style settings)
- Centered places dimension text inside the dimension line.
- Home text sends text to the default location (if you moved it).
- Move text alone lets you move dimension text without creating a leader between the text and dimension line.
- Move text with leader draws a leader when you move the text.
- Move with dim line is like using Stretch on the dimension.
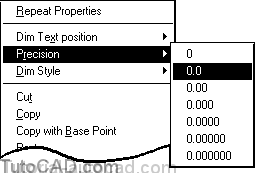
Precision changes the number of decimal places (see page 17)
Dim Style lets you apply other dimension styles to the selected dimensions or create a new style based on a selected dimension.
PRACTICE OVERRIDING DIMENSION STYLES
» 1) Close the drawing from the previous exercise.
» 2) Open the T205_5.dwg drawing in your personal folder.
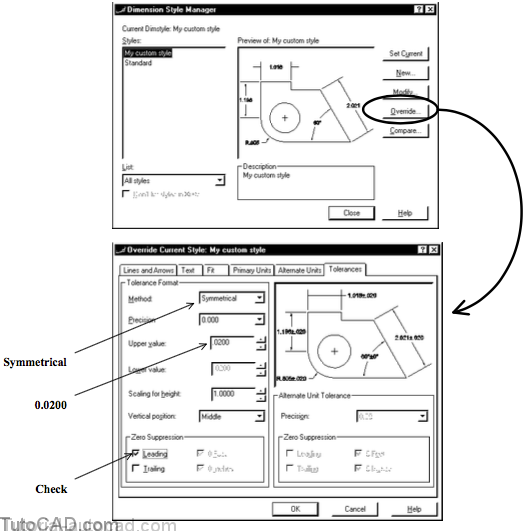
» 3) Pick Dimension + Style. Pick the Override button. Select the Tolerances tab. Select Symmetrical as the Method and enter 0.02 as the Upper Value. Check Leading for Zero suppression. Then pick OK to return but do NOT close the Dimension Style Manager box yet.
The tabs are arranged the same way whether you create a New style, Modify an existing style or Override the current style.
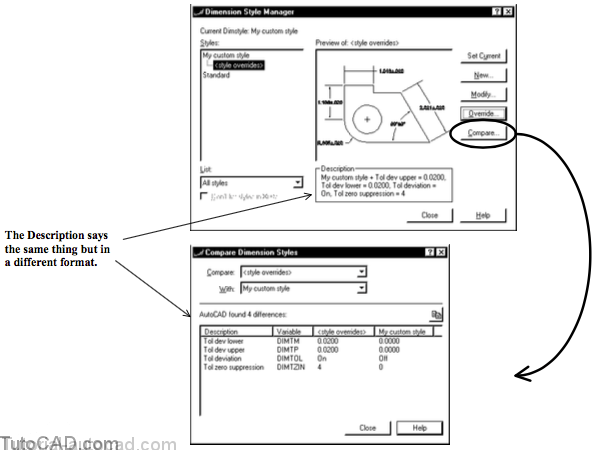
4) Pick Compare. Observe the differences between the <style overrides> and My custom style. Then pick Close to return and Close to terminate Dimstyle.
If all differences for <style overrides> do not fit in the Description area it may be a sign that a new style is required instead.
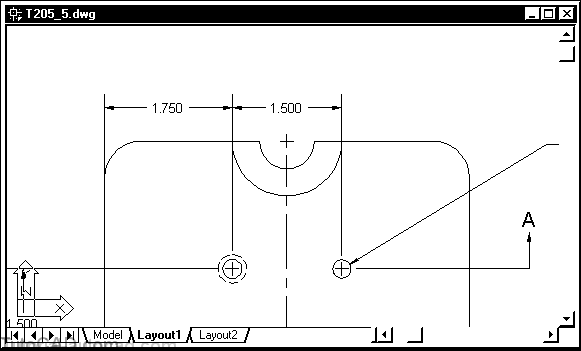
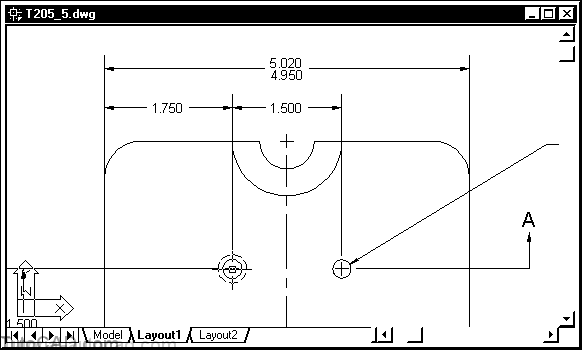
» 5) Zoom In to the top view so your screen resembles the illustration below.
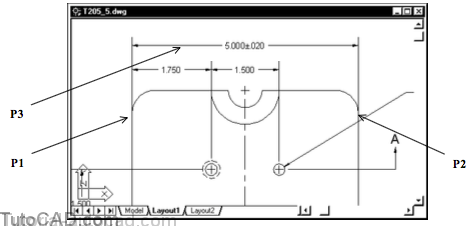
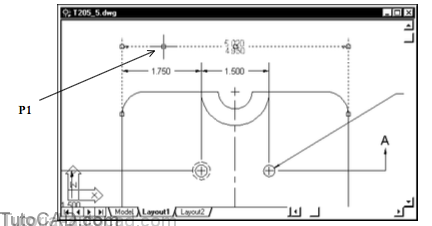
6) Pick Dimension + Linear. Make sure OSNAP is On in the status bar. Use Endpoint osnaps near P1 & P2 for the extension line origins & pick near P3 for the dimension line.
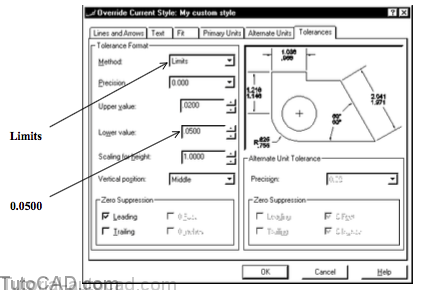
7) Pick Dimension + Style. Pick the Override button. Change the Method to Limits. Enter 0.0500 as the Lower value and pick OK to return. Pick Close to terminate Dimstyle.
8) Pick Dimension + Update. Enter L to select the last object you created and press <enter> to complete the command.
Command: _-dimstyle Current dimension style: My custom style
Current dimension overrides:
DIMLIM On
DIMTM 0.0500
DIMTP 0.0200
DIMTZIN 4
Enter a dimension style option [Save/Restore/STatus/Variables/Apply/?] <Restore>: _apply
Select objects: L↵
Select objects: ↵
Command:
The dimension that you created with the first override version did not automatically update to the new set of overrides.
- you had to explicitly update that dimension to use the current <style overrides> in effect.
- now you see the dimension expressed using limits that are calculated by adding & subtracting the upper & lower values.
AutoCAD also reports the current overrides in effect when you use the Apply option of – Dimstyle.
- you would have to press F2 to see them (see previous page).
9) Pick Dimension + Style. Select the My custom style and pick the Set Current button. Then pick OK when you are warned that you will lose these overrides. Observe that the <style overrides> disappear. Then pick Close to terminate the Dimstyle command.
10) Select the last dimension near P1 when no command is running to make it highlighted.
11) Right-click in the drawing area to invoke a shortcut. Select Properties to invoke this tool.
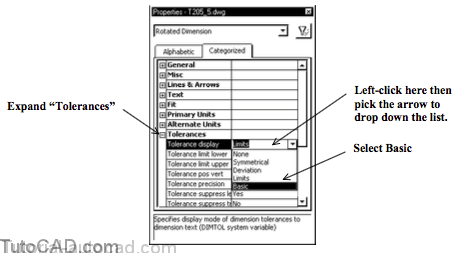
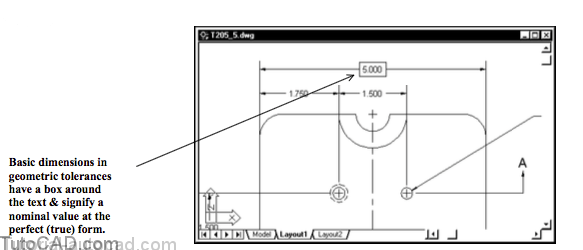
12) Expand the Tolerances category. Left-click in the box to the right of the Tolerance display property. Pick the arrow & select Basic from the list. Dismiss Properties and press <Esc> twice to clear the grips of the selected dimension.
Your Properties tool will probably look different and it may already be open and docked on the side of your AutoCAD Window.
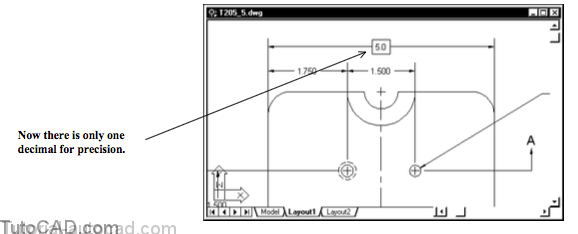
13) Select the last dimension when no command is running to make it highlighted again. Then right-click in the drawing area to invoke a shortcut. Pick Precision + 0.0.
Some drawings imply tolerances by the number of decimal places shown in the dimension text.
- this is a quick technique to change precision for a variety of dimensions without having to define several similar styles.
More practice?
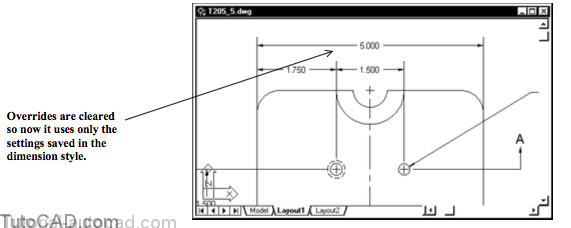
14) Pick Dimension + Override. Enter C to use the Clear overrides option then select the last dimension again.
Press <enter> to complete this command.
Command: DIMOVERRIDE↵
Enter dimension variable name to override or [Clear overrides]: C ↵Select objects: (pick the 5.0 dimension again)
Select objects: ↵
Command:
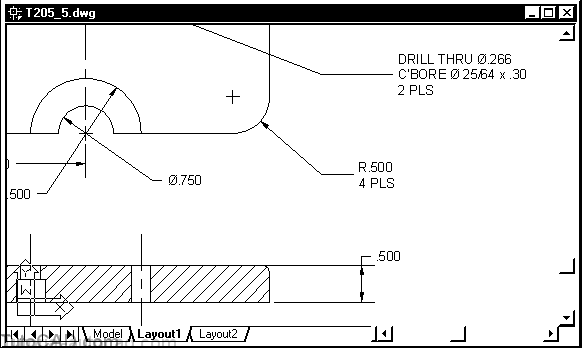
15) Pan & Zoom to see the .500 dimension in the section view as shown in the illustration below.
In short dimensions like this the default placement of text (as defined for the current dimension style) is not always what you want.
- it is easier to edit existing dimensions directly than to tweak dimension settings to achieve the desired results.
- you will use this technique in the next step.
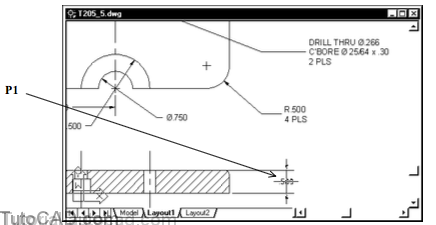
16) Select the .500 dimension to highlight it when no command is running. Right-click in the drawing area to invoke a shortcut and pick Dim Text position + Move text alone.
17) Move your cursor to see how the dragged dimension appears at various other locations. Left-click near P1 when the text is located as shown below.
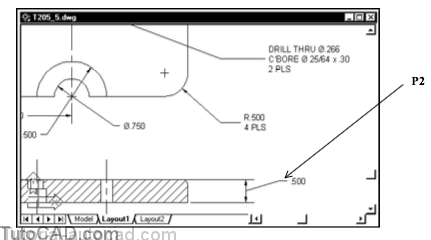
18) Select the same dimension again and right-click to invoke the same shortcut. This time pick Dim Text position + Move with leader then left-click near P2.
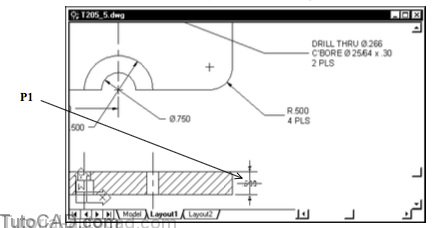
19) Select the same dimension again and right-click in the drawing to invoke the same shortcut. This time pick Dim Text position + Move with dim line. Move your crosshairs around to see the dimension stretch to new locations. Left- click near P1 to complete the change.
The Move with dim line option is like using Stretch on the entire dimension object
- but you can also move the text relative to the dimension which gives you more flexibility to arrange dimensions as you wish.
20) Save the changes to this drawing & Close the file.

