How to use MOVE & COPY Commands
Here is how to move and copy objects in AutoCAD
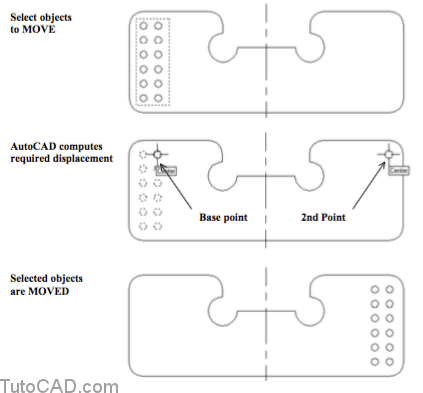
Use Move to move selected objects by a displacement.
- AutoCAD prompts for a base point and a second point then calculates the required displacement automatically.
- if you know the displacement you can enter it as X,Y at the first prompt & then press <enter> at the second point prompt.
Command: MOVE ↵
Select objects: (use selection tools)
Specify base point or displacement: (Base point)
Specify second point of displacement or <use first point as displacement>: (2nd point)
Command:
Use Copy to duplicate & move selected objects by a displacement.
- the syntax of Copy resembles the syntax of Move.
- AutoCAD prompts for a base point and a second point then calculates the required displacement automatically.
- if you know the displacement you can enter it as X,Y at the first prompt & then press <enter> at the second point prompt.
- you can also use the Multiple option to make multiple copies (without having to start over again to select objects).
Command:COPY ↵
Select objects: (use selection tools)
Specify base point or displacement, or [Multiple]: (Base point)
Specify second point of displacement or <use first point as displacement>: (2nd point)
Command:

PRACTICE USING MOVE & COPY TUTORIAL IN AUTOCAD
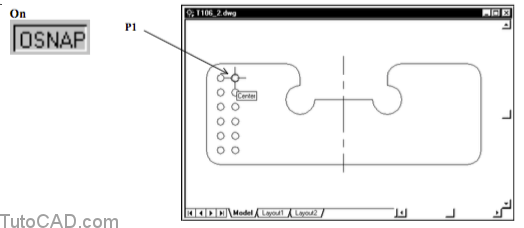
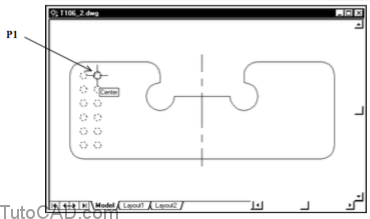
1) Open the T106_2.dwg drawing in your personal folder.
2) Left-click on the OSNAP status bar button (if it is Off).
3) Pick Tools + Inquiry + Distance. Hold your crosshairs over the CIRCLE near P1 to invoke a Center osnap and left-click to use this as the first point.
4) Hold your crosshairs over the ARC to invoke a Center osnap near P2 and left-click to use this as the second point and examine your command line history for the distance.
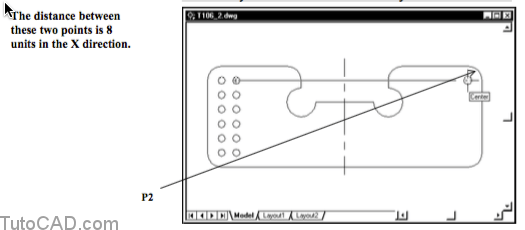
Command: ‘_dist Specify first point: Specify second point:
Distance = 8.0000, Angle in XY Plane = 0, Angle from XY Plane = 0
Delta X = 8.0000, Delta Y = 0.0000, Delta Z = 0.0000
Command:
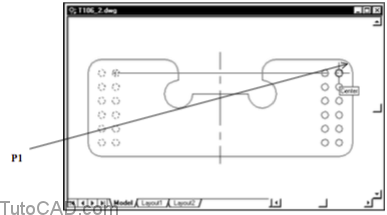
5) Pick Modify + Move. Hold your pickbox near P1 such that there are no objects underneath and left-click to use that point. Then move your cursor near P2 and left-click to select the 12 CIRCLEs with an implied Crossing tool. Press <enter> to signal AutoCAD that you have selected all objects for this Move command.
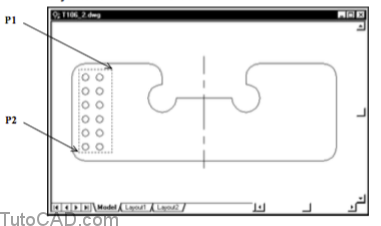
You could have used a Window tool to select these objects instead of using a Crossing tool.
- but to use an implied Window it may have been difficult to left-click on the first point & NOT select an ARC in the corner.
6) Hold your crosshairs over the CIRCLE near P3 to invoke a Center osnap and left-click to use this as the base point.
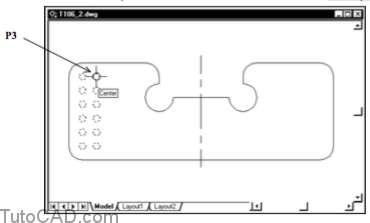
7) Hold your cursor over the ARC near P1 to invoke a Center osnap and left-click to use this as the second point.
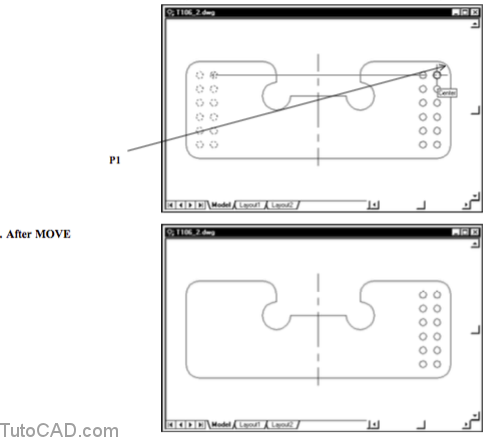
8) Right-click in the drawing area to invoke a shortcut and select Repeat Move. Then use the command line history shown below as a guide to move the same set of objects back to where they were before the last command.
Command: _move
Select objects: P↵
12 found
Select objects: ↵
Specify base point or displacement: – 8,0 ↵
Specify second point of displacement or <use first point as displacement>: ↵
Command:
When you enter P at the Select objects prompt AutoCAD uses the same selection set from the Previous edit command.

The selected objects are moved back to where they were before you moved them in the previous command.
You entered a negative value for the displacement ordinates that AutoCAD used automatically in the last Move command
- so the selection set was moved back to where these objects were before you moved them in the previous command.
9) Pick Modify + Copy. When AutoCAD prompts to Select objects enter P again to use the previous selection set. Then press <enter> to signal AutoCAD that you have selected all objects for the Copy command.
10) Hold your crosshairs over the CIRCLE near P1 to invoke a Center osnap and left-click to use this as the base point.
So far this Copy command works like the Move command.
11) Hold your cursor over the ARC near P1 to invoke a Center osnap and left-click to use this as the second point.
… After COPY

This time the selected objects remained where they were and a duplicate set of objects was moved by the specified displacement.
12) Save your changes to T106_2.dwg and Close this file.