How to use Quick Dimensions
Free lesson how to use Quick Dimensions in AutoCAD
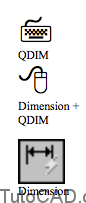
AutoCAD has a quick way to make multiple dimensions in one operation with the new Qdim command.
- Qdim may not replace other commands to create dimensions in production drawings but it can save time in some situations.
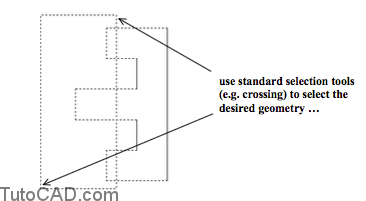
You select geometry and AutoCAD acquires key points of the selected geometry (such as endpoints and center points).
- these points are used as origin points for the new dimensions.
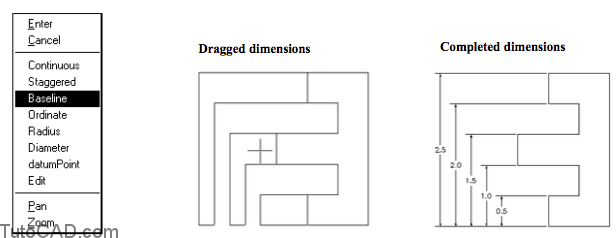
You can right-click to invoke a shortcut menu to select the type of dimensions that you want to create.
- this is retained as the default for the next time you use Qdim if you want to create more dimensions of the same type.
- left-click when dragged dimensions appear the desired way.
Practice : quick dimensions tutorial in AutoCAD
- Close the drawing from the previous exercise.
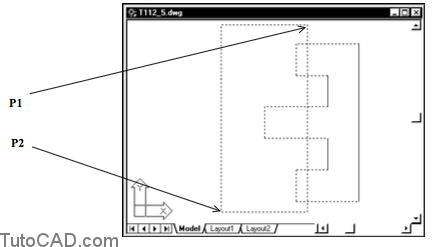
- Open the T112_5.dwg drawing in your personal folder.
- Pick Dimension + QDIM. When prompted to select geometry pick in empty space near P1. Then pick near P2 as the other corner of an implied Crossing tool to select the nine highlighted LINEs below & press <enter> to continue.
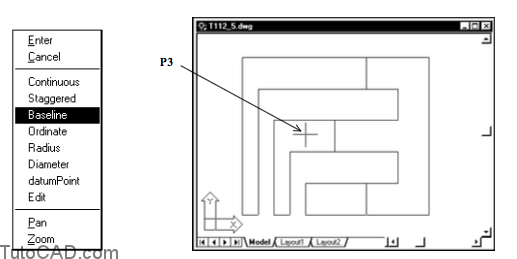
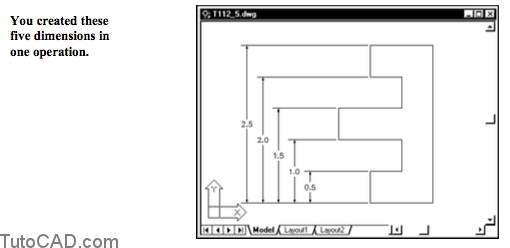
4- Right-click in the drawing area to invoke a shortcut and select Baseline. Move your crosshairs near P3 so the dragged dimensions look like the illustration below and left-click to use this point.
5- Enter U to undo the last command.
6- Pick Dimension + QDIM again and use the same technique to select the same nine LINEs & press <enter>. Right-click to invoke the shortcut and select Ordinate. Move your crosshairs so the dragged dimensions look like the illustration below and left-click to make the dimensions.
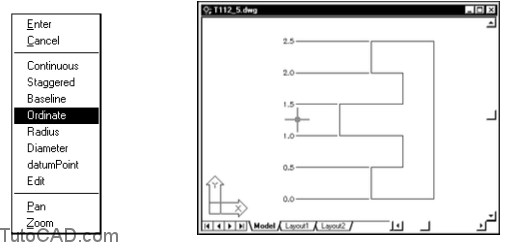
The UCS origin was already set for the lower left corner of this part so the bottom dimension is 0.0.
7- Undo the last command and repeat with the Continuous.
8- Save the changes to this drawing and Close the file.